One of my favorite features in iOS 17 is the new Groceries list in the Reminders app. Here is how you can use it.
Everyone likes to browse the rows of shelves when we are at a grocery store or supermarket. Some people like to create shopping lists which help them get the stuff they want, either by jotting down the items on a piece of paper, or by using To-do apps. But sometimes these handy lists can be annoying, depending on the way they are organized. For example, you may have added a couple of items at the last minute, and you could be walking around checking off one item at a time. But then you may find yourself dragging the shopping cart all the way back to an aisle that you passed by earlier, because a product that you wanted was lower down in the list.
The Reminders app in iOS has always been a popular way for shopping. And the new grocery list feature can help you in the above scenario. How can it do that? It can sort groceries automatically into different categories. Here is how it works.
How to create an automatically-sorting Groceries list in the Reminders app in iOS 17
1. Open the Reminders app.
2. Tap on Add new list.
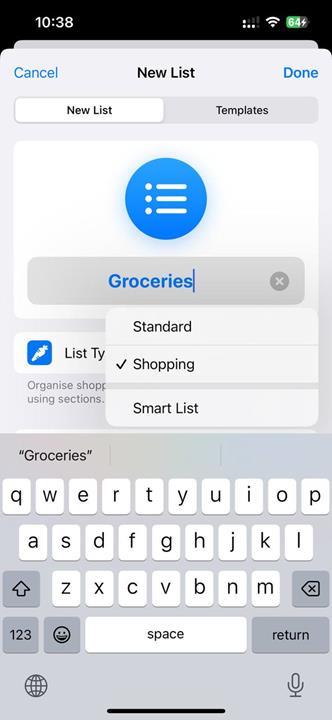
3. Give it a name. It doesn't have to be Groceries or Shopping, you can name it whatever you want.

4. Tap on the List Type, and switch it from Standard to Shopping.
5. Tap on Done (at the top of the screen).

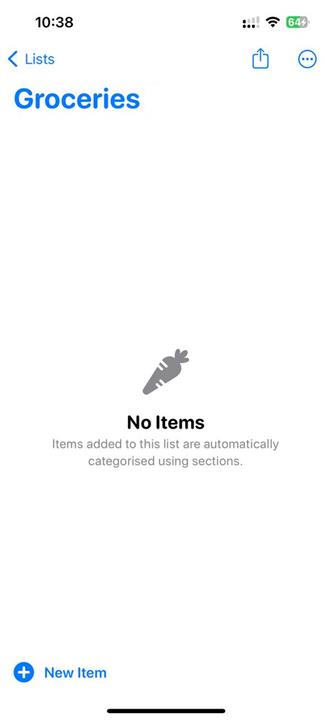
6. Add a few groceries. The Reminders app will automatically sort each grocery type into its own category.

Note: Apple's web page for the feature says that the list type's name is Groceries. The app doesn't have such an option, it only shows Shopping as a list type, but it still works the same. The documentation on the page is actually quite misleading. It claims that you will need to enable iCloud for Reminders in order for the Groceries list to work. This is incorrect, you can disable iCloud for Reminders, and the feature works perfectly. he iCloud opion is only
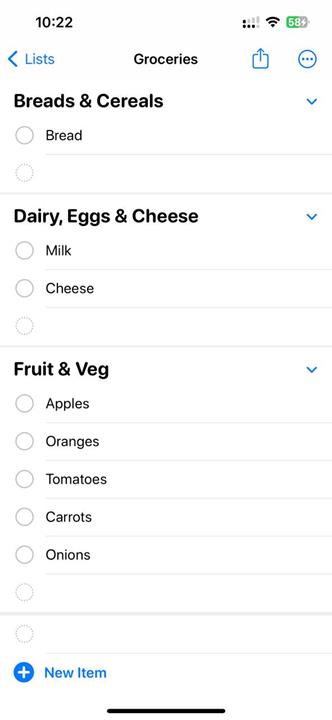
Let's say you added Bread, Milk, Cheese, Apples, Carrots, Tomatoes, Onion. The Reminders app will sort the groceries automatically into three categories: Bread and Cereals, Dairy, Eggs & Cheese, Fruit & Veg. This will help you shop efficiently as you move around the grocery store, e.g. when you are in the produce section you can get the items under Fruits & Veg, and so on and so forth.
You can manually sort the items by dragging them onto a different place, if you don't like the category under which the Reminders app placed it automatically. Similarly, you can drag and drop the items in the list to reorder them per your requirements. You may rename the categories too.
The Reminders app also allows you to add your own section for items that do not have a default category. For instance, I want to buy some soda, and add Coca Cola to the list. It doesn't get sorted automatically in the list. Tap on the item's name, and then on the information button (the i symbol), and scroll down to "Section". Tap on it, and then on the field that says "New section with selection". Give it a name, e.g. Soda, and press the Return key. This will add the new section and add the selected item to it.
The Reminders app remembers your preferences and adds items to the appropriate section the next time you create a new groceries list.
Thank you for being a Ghacks reader. The post How to create an automatically-sorting Groceries list in the Reminders app in iOS 17 appeared first on gHacks Technology News.
0 Commentaires