Windows 11 is one of the best versions of Windows in a long time. It comes with various powerful pictures; however, it comes with a few bugs as well. One of the problems that a lot of users face is their updates being stuck. The frustrating part is some updates reach as much as 99% and stay stuck. This article will look at a few ways you can resolve this issue.
Leave Your Computer
One of the ways to fix this problem is to leave your computer while the update is downloading. The updates usually get stuck due to interruptions in internet connectivity or power surges. Plug in your computer and leave it while the updates are downloading. It may happen faster and the update will not get stuck.
Windows Troubleshooter
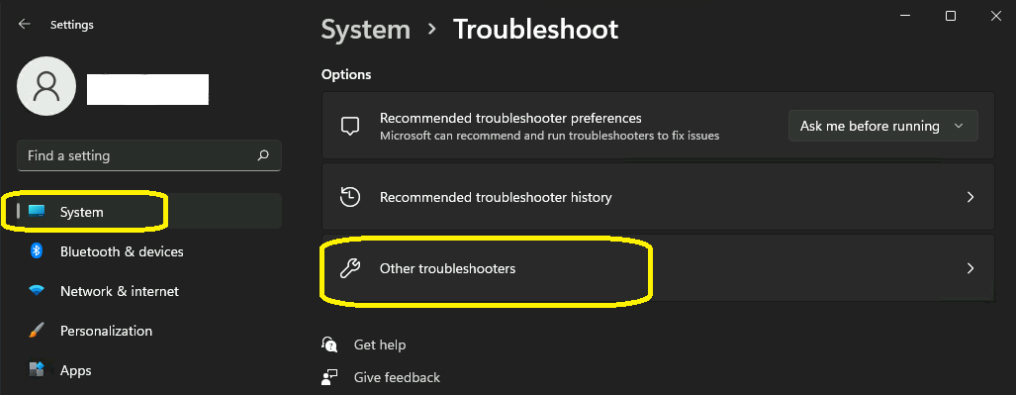
If your trouble with updates is not resolved, you can try the update troubleshooter. To do this, go to settings and then click on update & security. Once there, click on troubleshoot and then additional troubleshooters. On the next window, you will see an option called windows update. Click on 'run this troubleshooter.' The troubleshooter will look for any issues and fix them. Once it is fixed, you will need to restart your computer and the update will download and install after that.

Software Distribution Folder
You can also go to 'C:\Windows\SoftwareDistribution' and see if the update is still happening. This is the software distribution folder that stores temp files and has all the data needed for updates. Right-click inside this folder and then click on properties. Check the size of the folder to see if the size is increasing. If it is the same, you can follow the below steps:
Switch off your Windows update. To do this, type 'cmd' in the start menu, right-click and select 'run as administrator.' Type the command "net stop wuauserv" and "net stop bits" and this will stop the update.
You must then delete the update files in the distribution folder. Finally, you switch on the updates by running the command prompt again and typing "net start wuauserv" and "net start bits." This should resolve the Windows update issue.
Uninstall a Conexant Audio Device
Disabling Auto Driver Downloads
Uninstalling a Conexant audio device is straightforward and has worked for a few users. To do this, open your start menu and then your control panel. Under the control panel, click on 'system.' You then need to select advanced system settings and click on the hardware tab. Click on the device installation settings and choose 'No' as the answer to the question and then save the changes.
Uninstalling a Conexant Audio Device
You must then open the device manager and look for your audio device under the 'sound, video and game controllers.' Right-click on the device name and choose uninstall device. You will get a confirmation pop-up. Click on uninstall.
Restart your computer and go to your device manager again to see if the drivers are not installed. Run the Windows 11 update again and after it's done, re-enable the driver downloads once the update is done.
Don’t Get Frustrated Anymore
Stuck updates can get frustrating if you're not sure what's causing it. We hope these tips will help you get resolve stuck updates with Windows 11.
Thank you for being a Ghacks reader. The post Windows 11 Update Stuck: Fixed For Good appeared first on gHacks Technology News.

0 Commentaires